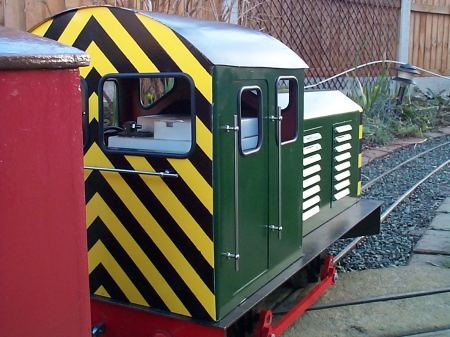
RIDE ON RAILWAYS
esales@rideonrailways.co.uk
Made in Britain
Tel 01708 374468

The Body (shunter)


  • Although the body is supplied with metal work pre welded it will still require quite a bit of work. Using a flat file, clean off the high spots from the welding. This mainly occurs on the cab roof. Do not be afraid to over file as any over filing can easily be rectified with a bit of car filler.

  • The radiator panel can be fixed by drilling holes through the bonnet and into the edge of the panel. Then secured using small domed cross head screws. It is also recommended to apply a "no nails" glue/gap filler to the edge of the MDF before finally securing the panel.


  • Handrail holes have not been drilled on the bonnet but may be simply drilled if required. A nice location is roughly 10 mm up from the lower fold on the side.

  • Degrease the metal work and prep before applying a zinc or red oxide primer.

  • Traditionally front end wasp strips did not go over radiator grills. The radiator grill is best left out, and painted separately. To stop seeing the batteries a matt black board should be fixed behind the front grill.

  • We found it was easier to paint and apply the bonnet side grills once the bonnet was finished. The most successful method of fixing was to use a contact adhesive. Super glue also worked well but was it was hard trying to stop it running onto the paint work. The grills could also be riveted on if you don't mind the look of rivets.

  • Handrails should be fitted after the final paint has been applied. The rails can either run through the stanchions or terminated just past and filed round to mimic an end stanchion. The rail is fix by a small dab of super glue in each stanchion.

  • The choice of colour is yours be we would recommend not using any matt paints on the body work.


Wasp Stripes - add after main body work paint is complete.

Although not realy prototypical for narrow gauge loco, wasp warning stripes on the loco ends really add a splash of colour.

Wasp stripes can be easily created by over laying masking tape on a yellow background

  1. Mask off the area you require the stripes using a low tack tape to avoid it pulling off paint. (do not apply tape to paint until thoroughly dry eg 24hrs+)

  2. Using Ford Signal Yellow spray the whole area and allow to dry.
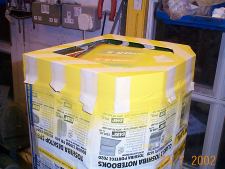
  3. Mask off the stripes using a 20mm masking tape. The tape represents the yellow stripes. The stripes are set at an angle of 45º.

  4. Use a 45º drawing square (or a folded paper square) and set the two longest stripes on the top. Then use a piece of tape to set a space before laying the stripe below.
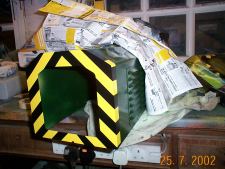
  5. Ensure all the edges of the tape are pushed firmly down otherwise paint will bleed through onto the yellow.

  6. Leave the ends of the masking tape long and folded over to help remove it once tha paint has ben applied.

  7. Apply the black paint , check very carefully for coverage and then start removing the tape. Removing the tape while the paint is wet helps to avoid tearing.


Above stripes masked and ready for the black paint

End result


  • Once paint is dry apply the window bead to all windows. As true to real life practice keep the join on the bottom edge. That way if water gets in it stands a better chance of draining away. Start at the bottom centre pushing the bead tightly into all corners. Cut the bead around 5mm too long and then push it into place.

  • The body work will tend to slide on the chassis and scratch the deck paint work. Place the body on the chassis and mark on the deck its correct location. Mark the inside corners of the rear of the cab and the front two corners under the bonnet (through the rear windows and the front grill hole). Drill a 5mm hole within these marks on the chassis. Run a nut up a 5mm bolt till it locks with the head. Then put the bolt in the hole and bolt it in place from the underside. Repeat this for the four holes. This will provide location for the body work and stop it sliding out of place. They are also removable should you choose to put another body on the chassis.


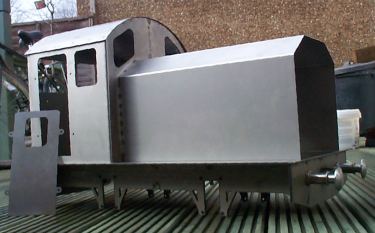
Colours used on our prototype and "ready to run" engines- car spray paint

  • Main body - Rover - Brooklands Green

  • Roof and black on wasp stripes - Satin Black

  • Yellow on wasp stripes - Ford - Signal Yellow

  • Buffer beam , coupling rods and cranks - Ford - Radiant Red

  • Chassis - Matt Black


Hercules owners  


Copyright Ride on Railways Ltd 2013